Tutorial: Create a Post

This is a tutorial on how to create a post on your new blog!


This post was created using the Support Document on Blogger, titled Create, edit, manage, or delete a post


A “post” is an entry on a blog. Posts can be viewed on the blog’s homepage, a news feed, or their own separate page.


Steps:


1. Open Blogger in your preferred browser, and click “sign in.”


Link to sign in to Blogger.


2. After you sign in, you will be directed to the “posts” page. Click on the button “New Post” towards the left side of the screen. 


The button to create a new post on Blogger.


3. A WYSIWYG (what you see is what you get) text editor will open. Insert a title and the post’s content. The way your content is structured in the WYSIWYG editor, will be how it's structured on the published blog post. 


The text editor on Blogger.

4. When you’re done writing your content, you can preview how your post will look by clicking the “preview” button.


Button on Blogger to preview post.


5. You will be brought to the preview page. Click the back arrow to return to the text editor.


A page to preview your post on Blogger.


6. When the post is complete, you can click the “save” button to save the post as a draft. You can edit or post drafts at any time. 


The button to save your post on Blogger.

7. Or to publish your post, click the “publish” button.


The button to publish your post on Blogger.

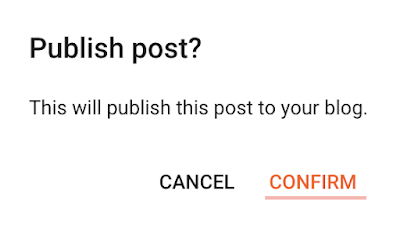
8. Click “confirm” when your post is ready to be published.


Publish post on blogger.


9. It's now up! It will be listed in the “posts” section of Blogger. 


Where your published post will be listed on Blogger.


10. To view your post, click “View blog” on the left side of the screen.


Button to view your Blogger Blog.


11. You will be directed to your blog’s home page, where you will see your post. 


Published post shown on Blogger blog.


Congrats, you have created your first post on your new blog!

Comments

Popular posts from this blog

Tutorial: Design Your Blog with Gadgets

This is a tutorial on how to customize the style of your blog by using Blogger’s Gadgets. This post was inspired by the Blogger Document, titled Change the design of your blog . “Gadgets” are tools a user can add to sections of their blog, such as the sidebar. Each gadget has a different feature, like search bars, follower counts, and more! Steps: 1. Log into Blogger. 2. On the left sidebar, select the “Layout” tab. 3. Click on the blue “Add a Gadget” hyperlinked text. In my example, I will be adding the gadget in the  sidebar.   4. Select the Gadget. 5. Customize the gadget’s settings and select “Save.” 6. The gadget should now be displayed!

Review: summer-2022.blogspot.com

This is a review on a fantastic tutorial-style blog, CIS 210 Social Website development assignments ! For all things Blogger, be sure to check out this very helpful blog! The posts are informative and easy to follow. The creator uses screen grabs and attention-grabbing symbols like check marks and underlining that help explain their topic even more. They prioritize accessibility, their symbols are high contrast and they include alt-tags on their images.  Also, they prioritize design. They use a beautiful blue theme! It truly reflects the writer's love for nature.   My favorite post, Theme Can Capture Your Audience ,   is an outside-the-box post with great descriptive writing that includes a hyperlink, which reads, “Click to Change Your Theme.”  This leads to a well written tutorial on how to customize your blog and it's theme. So creative!

Tutorial: How to Follow Blogs

This is a guide on how to follow blogs on Blogger. This post was created using the Support Document on Blogger, titled Manage blogs you follow . You can follow blogs to stay up-to-date with their posts! Steps: 1. Log into your Blogger account. 2. Select the “Reading List” tab on the left side bar. 3. Click the “Manage” button. 4. Select “Add.” 5. Insert the blog’s link. Click “Add another” if you would like to follow multiple blogs. Then select “Next.” 6. You will be brought to the “Following Options” page where you can select if you’d like to follow the blog(s) anonymously or publicly under your account name. 7. Select “Follow” to follow the blog(s).